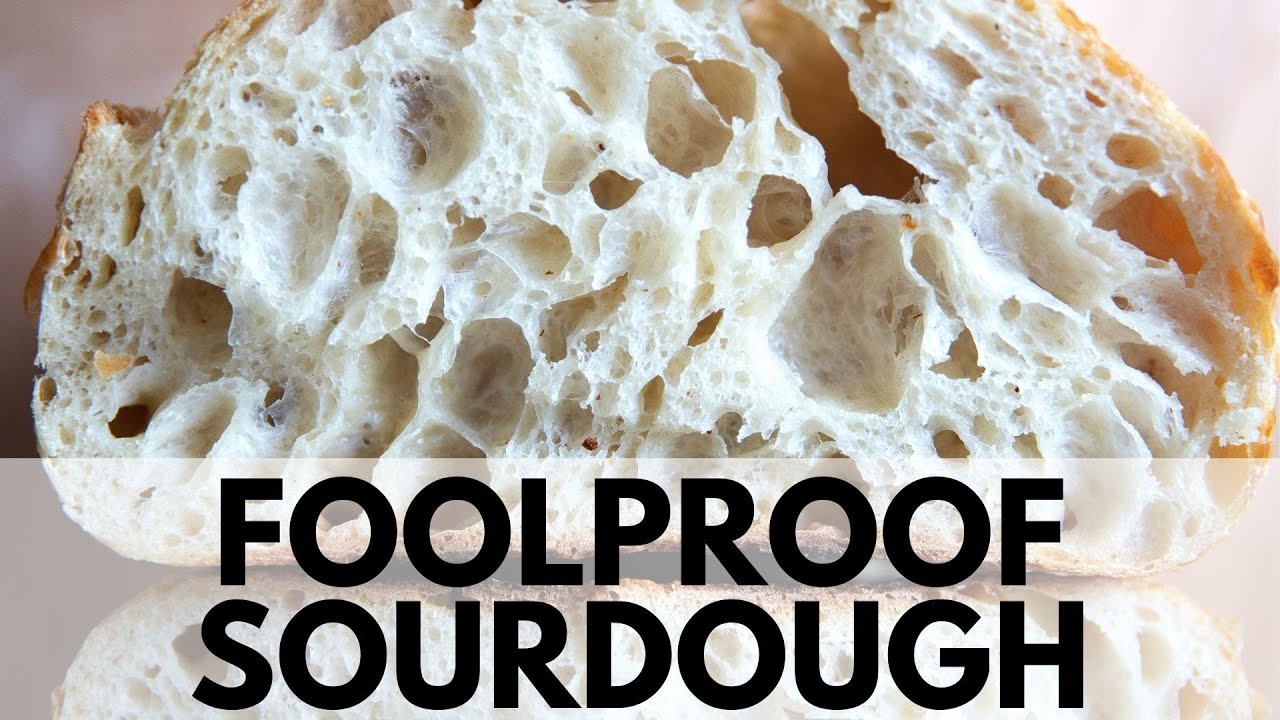
Simple Sourdough Bread: Step by Step 🍞🍞75% Hydration

This is a very basic sourdough bread: 500 g flour, 375 g water, 100 g starter, and 11 g salt. It follows the same process/formula as my Whole Wheat-ish Sourdough Bread recipe. This one makes a slightly larger loaf and calls for all-purpose flour or bread flour (no whole wheat, though you certainly could add some if you wish).
At the end of the video, I should you the crumb of two different loaves, one that underwent a 6-hour fridge proof, and one that underwent a 24-hour fridge proof.
A longer, cold proof is the key for a lighter, airier crumb.
Update: In the video, I end the bulk fermentation when the dough has doubled in volume. More recently, I have been ending the bulk fermentation when the dough has increased by 50% in volume. If you’ve had success with letting the dough double, continue to do so. I am finding I actually get even better oven spring, when I shorten the bulk fermentation and don’t let the dough grow so high.
Find the full recipe here:
–⏱️Timestamps⏱️—
0:00 Combining the water, sourdough starter, salt, and flour.
0:26 Mixing the dough.
0:43 Transfering the dough to a straight-sided container.
0:51 First set of stretches and folds.
1:10 Second set of stretches and folds.
1:16 Third set of stretches and folds.
1:22 Fourth and final set of stretches and folds.
1:41 Dough left alone to rise.
1:51 Dough doubled in volume.
2:00 Preshape + Bench Rest.
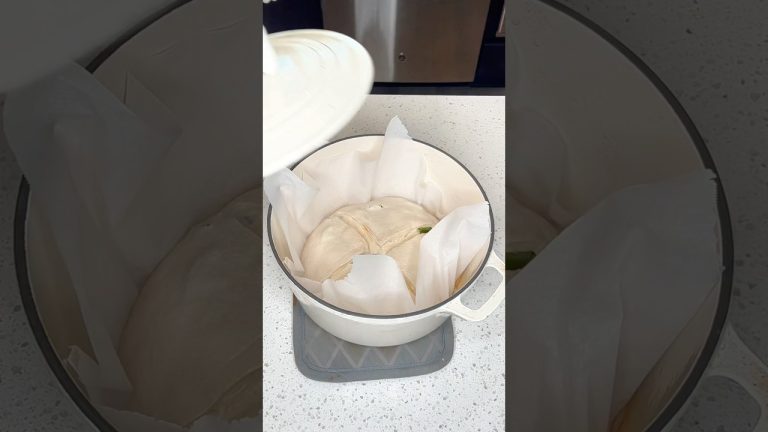
2:29 Preparing the banneton with a flour sack towel and rice flour.
2:41 Final shape.
3:07 Transferring sourdough to prepared banneton and then fridge.
3:26 Scoring a sourdough boule after a 6-hour cold proof.
3:49 Transferring sourdough to preheated Dutch oven.
4:20 Removing baked loaf of sourdough from the oven.
4:23 Cutting the sourdough boule (6-hour cold proof).
4:35 Cutting the sourdough boule (24-hour cold proof)
source


This is the easiest sourdough bread recipe that I have seen!! And I have watched a plethora of them!!!
Like someone else mentioned, I like the fact that I could enjoy watching your recipe peacefully. But the best part of the video is that you don’t have overly done nails!
This is only my second attempt and making sourdough bread the first time it was under fermented and my starter was definitely not ready. Since then I started a new starter and it's definitely more active than the last one. So I'm curious in the video it says it took 10 hours for it to double. I started mine at awkward time and that 10 hour mark would be about 1:00 a.m. in the morning for me. Would it hurt if I allowed it to go a couple extra hours because I get up at 3:30 a.m.?
Also I noticed your dough doesn't stick to your fingers as much. During my set of stretches mine really sticks to my fingers. I Don't know if you're using all-purpose flour but I'm using bread flour in my recipe. I didn't know if this would matter or make my dose stickier.
Ik heb al een aantal zuurdesumbroden gebakken maar deze was echt fantastisch.
Zo lekker luchtig deeg gewoon geweldig
Plz tell me what make and model is your stove/range? Thx
Why is my dough sticky to work with, after proofing on the counter???
When I've taken the bread out the fridge, I score it straight away and then do I leave it to rest while the oven is heating? Or perhaps the oven should heat first and then take it out and score it and put it immediately into the oven?
So after the cold proof in the fridge do you go straight into the hot Dutch oven to bake or bring the dough up to room temp before putting into the oven?
Never seen a side by side of different cold fermentation lengths and thought it only affected the taste, thank you for showing that! What is your fridge temp during these 6-24 hours?
Wow, that sourdough looks Amazing!! Great video, thanks for sharing!
Thank you !
I have had So Much success with this concise, easy to follow video! Best 3 loaves I’ve made! I do add the salt with a little extra water after the first rest period, but that’s all I change. Thank you for this! Before this recipe, I was making some real bricks! lol 😂❤
Hi Alexandra,
question, you note 50 to 100 grams of starter. So, the bread will come out the same if you use 50 grams or 100 grams of starter.
Thank You, Tom
I was going to make sourdough tonight 6pm uk time, then i realised its a loooong process, like days! Can it not be done any quicker?.😭
Hi I used your recipe with the exact measurements with 100 gr of starter but the dough is very sticky even after 4 sets of strength and folds. What am I doing wrong?
New subscriber here, I have watched so many videos and I came across your video on how to shape up sourdough, I like what saw, surely will do it this way from now on, thanks for sharing
My second time making your recipe and it's the best tutorial ever! First time I proofed for 6 hours, 2nd time I proofed for 24 hours. Everything is just as you said. The 6 hour is still very delicious tho! Thank you so much.
Awesome
When you transfer to fridge leave we leave it wrapped in the cloth?
Love the video.. when you say 50 – 100 gr of starter.. what determines how much. It is such a large gap. Would the final product be the same if I use only 50 than if I use the full 100 ?
I’m using this recipe now as I’m getting much better quality bread so I thank you.