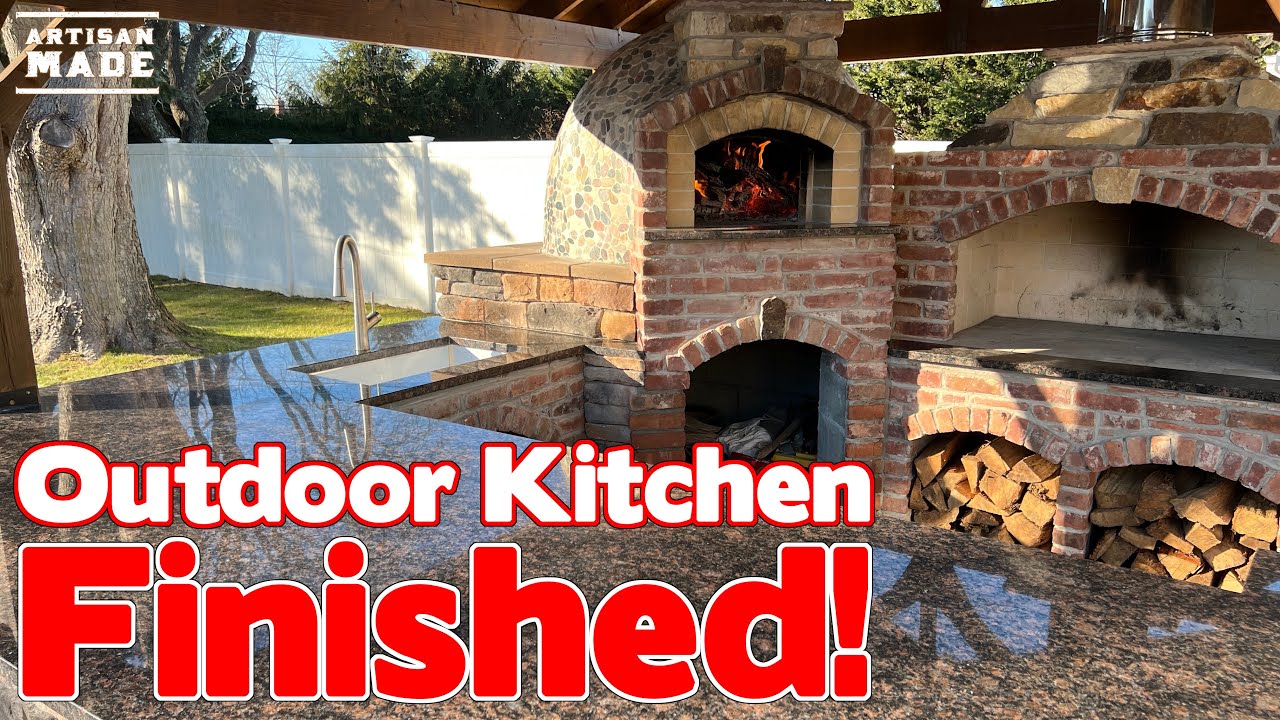
Building An Outdoor Kitchen With a Wood Fired Oven and BBQ / Part 15 / Granite Countertop Install

This is part 15 of my outdoor kitchen series. In this segment of my outdoor kitchen build, I will show you all of the steps that I took to prepare for the installation of the granite countertops. I will also finish all of the remaining stone work. If you are new here and would like to see the other parts of this project, see the links below.
Artisan Made Truckers Cap:
My Etsy Shop:
My Website:
Follow:
Links to the other parts of this build:
Full Playlist:
Part 1: Building the base (This is my first video ever so go easy on me)
Part 2: Building the form (This is my second video ever. Slightly better that the first)
Part 3: Insulating the oven floor
Part 4: Installing the floor
Part 5: Building the Dome
Part 6: Building the Landing, Arches and Chimney
Part 7: Curing Fires
Part 8: Insulating and Rendering the brick oven
Part 9: How to build a wood fired BBQ:
Part 10: Kitchen Counters:
Part 11: How to Frame A Roof For An Outdoor Kitchen:
Part 12: Chimney Installation
Part 13: How to build a Brick Arch
Part 14: Installing Stone Veneer Over Cinderblock
How to Make the Indispensable Tool:
Frequently Asked Questions About My Brick Pizza Oven:
Avoid My Mistakes:
source


The angle iron will rust and stains will run down everywhere.
Lovely job, fair play!
realy beatiful, congratulatio, from Chile sudamerica.
mic is to loud you may wanna turn it down a little
Because I’ve had the same problem with granite installers we sheet with 3/4 plywood in interior or cement board on exterior applications. This prevents then from being able to leave gaps or unsightly shims. Have your granite installer bullnose the front to cover the underlayment. A little extra money and time up front will save you in later replacement costs.
I the tripod as work-holding for the drill press. If it's stupid but it works, it's not stupid.
Use cuttings oil please
Absolutely love your outdoor kitchen. What a wonderful idea great thing to have. As a bricklayer with more than 30 years experience, you are correct your brickwork is rough as a bears arse. However, hats off to you, you gave it a go got stuck in and built it. Not a fan of that licking stick artificial stone. How it will discolour over time for sure. What can I say? I’m a brick and stone mason I like the real thing. You are perfectly correct about your granite top. It should not have been just shimmed up. It should’ve been bedded. Granite like most stone is strong in compression, but not intention. It had the potential to snap and crack as a result of the way they installed it.. this is what happens when you find someone who’s not qualified to do the job correctly. I seriously doubt they were actually stonecutters. But I have to admit I have seen a lack of pride in a lot of tradesmen‘s work over the years. It’s not like it used to be. People buy fake and artificial now they want it done quickly and cheaply. Unfortunately, this brings a on qualified workforce and cheaper crapper material. But I’m sure you will get many great years of use out of your outdoor kitchen. Fantastic thing to have.
Karen 😅
Inspirational Buddy!
As someone who also built a backyard kitchen with a pizza oven too, as well as a 15 year granite fabricator installer.
Yes I’ve had plenty of customers say the same thing that 2-4 weeks turned into 10-12 weeks.
And shims are used to level the granite, you must place shims every 12 inches where it’s not supported. Then you also add RTV silicon as both securing it and providing some of that support as it should get pushed into the gap.
Absolutely loved following this project and am planning on doing something on a smaller scale. Yours turned out amazing! Could you talk a little bit more about the sink? I couldn’t find anything on how it was installed and only saw that there is a drain line. Just curious how you get the water there. Thanks! Keep up the awesome, informative videos!
BEAUTIFUL
Dude I’m a bricklayer for 15 years you did good
Wow ! You are talented! Amazing work!
I install stone, and I agree with you that leaving spaced out wood shims with long runs of gaps like that is insufficient for support – especially in an exterior application. Although I do see a lot of people operate that way. It does look like the surface may not have been very flat though because those gaps did look pretty big, which isn't ideal. If I were them, I would have packed in polyester resin in a bunch of spots all over under the gaps, as well as to replace the wood shims. The polyester will create a non compressible shim once it cures after 15-30 minutes or so. Then I would fill all the gaps in with a sealant like you did, but make sure to use something suitable for exterior/waterproof application.
Edit: I see that you installed veneer with mortar. If installed tight under the stone, that should provide support. If you want to add support, you could key in mortar, polyester, or epoxy into the gaps underneath from the inside.
If I had to guess, they probably used a polyester resin in the seams like most granite guys do, which is not suitable for exterior application for bonding of stone. It will degrade over time, and at an accelerated rate outdoors. I'm only suggesting to use polyester to replace shims for support. You have to use either a two part epoxy that requires a cure time of 8-16 hours or leave small 1/32-1/16" expansion joints at the seams and fill them with silicone.
Hope the right approach was to not pay those lazy fucks, that's the approach I would take.
Nice!
I always had a different perspective of New York in my mind! Something like the busy Manhattan or Brooklyn! When I first saw you, I thought you lived in California or something! But when you said you're living in NY I was shocked. Would you mind telling me which area of New York you live in? since the neighborhood is so stunning and wondrous!
good job ,now I want to see you bbq on each one what do they do how does it all work together
how much did it cost you ????
Very nice and an excellent job!!!
Beautiful! My husband used your channel as his Go-To channel for your pizza oven project to build his own: he is very pleased with the result and pretty much culinary married to it! 🙂
You may not be a mason but your brick laying looks great for an outdoor kitchen……..not so good for a house
A completely unnecessary support for your very expensive granite…… don't worry about it
amazing job looks awesome
Amazing kitchen; I love how these YouTube guys portray themselves as “diy” and inexperienced but then you can’t help but notice 100k$ worth of pro tools
I know Woodglut has the best woodworking plans.
I like the jigsaw tools you used cutting the cement/bricks. What brand is that, can you use that also to metal, and woods?
Now that is a kitchen !!!
Great now can you come over and do mine? 😉
Beautiful
Amazing work! Would love to see a vid of it all in action! (firing up the fireplace, wood oven, making pizzas etc! ) Well done on such a great build!
That is AWESOME!!! I appreciate people that focus on all the fine details.
Granite should be placed on dabs of silicon. Never use wood shims, use plastic instead, especially outside in moist conditions.
It looks beautiful. Would love to see a video where you demonstrate what you can do with it and how it works. Thanks for sharing. 👍
Congratulations, that’s nice!