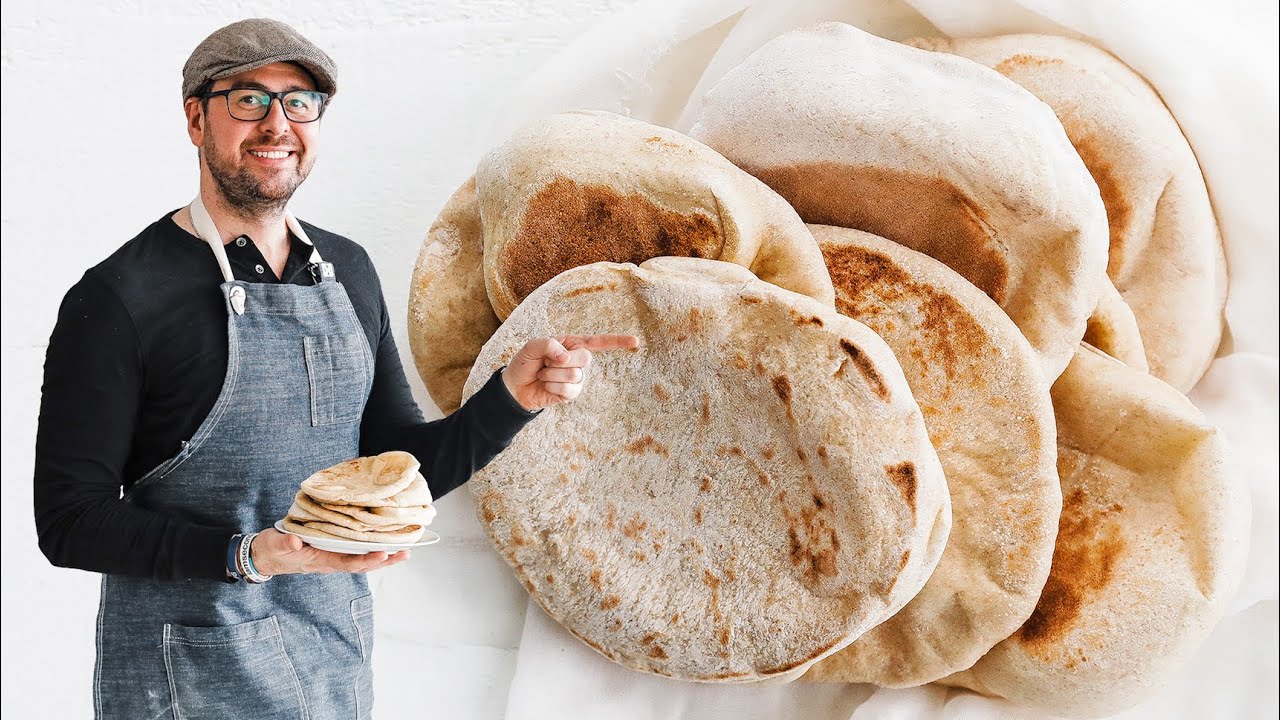
Homemade Pita Bread Recipe

I’ve got great memories of making sandwiches with my dad using pita bread and stuffing it up with as much lettuce, tomato and lunch meat as possible. Learn how simple it is to make this homemade pita bread and serve it up to friends and family.
Affiliate links for the products used in this video:
Kitchenaid Mixer –
Glass Mixing Bowls –
Proofing Container –
Bench Knife –
Rolling Pin –
Pizza Stone –
Cast Iron Skillet –
Measuring Cups –
Ingredients for this recipe:
• 1 ½ cups warm water (110° to 115°)
• 1 packet of active yeast
• 2 tablespoons sugar
• 3 cups all-purpose flour
• ¾ cup whole wheat flour
• 2 teaspoons sea salt
• 3 tablespoons olive oil
Makes 14 pitas
Prep Time: 25 minutes
Cook Time: 15 minutes
Rise Time: 2 hours
Procedures:
1. Add the water, yeast and 1 tablespoons of sugar to a stand mixer and whisk using a hand whisk until it is combined. Let sit for 5 to 7 minutes or until a raft has formed on the top.
2. In the meantime, whisk together the remaining 1 tablespoon of sugar, flours and salt until combined.
3. Pour 2 tablespoons of olive oil into the stand mixer along with the dry flour, sugar and salt ingredients.
4. Place on the hook attachment and mix on low speed for 8 to 10 minutes to knead.
5. The dough should be smooth, and you want the dough to be a little sticky, but you still may need to add in a bit more flour to get it to the right consistency.
6. Coat with the remaining 1 tablespoon of olive oil and place in a container and cover with a lid or towel and let sit for 2 hours or until doubled in size. See note below on resting trick.
7. Remove the dough and place on a lightly flour dusted surface and press to form a rough rectangle.
8. Cut the dough into 12-14 pieces and then taking each piece of dough keep folding it under to form a smooth dough ball.
9. Roll each dough ball out on a lightly flour dusted surface until it’s about 1/8” to 14” thick and 6” to 8” in diameter.
10. Place on a cookie sheet tray lined with parchment paper or just on parchment paper on your countertop and cover with a towel and allow to rest for 20-25 minutes.
11. Cook on a preheated pizza stone or sheet tray in the oven at 550° and cook for 1 to 1 ½ minutes per side until dark brown marks are formed onto the dough and so it puffs up into a hollow ball.
12. Repeat the process until all the dough balls have been cooked. See note below and alternative cooking method.
CHEF NOTES:
• How to Reheat: The best way to warm up pita is to wrap it up in foil or in a pan with a lid and place it in the oven at 350° for 4-5 minutes or until warm.
• Make Ahead: You can make this bread up to 1 day in advance and heat up before serving.
• How to Store: Place covered in the refrigerator for up to 5 days.
• How to Freeze: Place covered in the freezer for up to 1 month.
• You may use 100% all-purpose flour in this recipe.
• When the dough is done kneading it should be smooth and spring back when pressing down, and if you pinch it, it should stick a bit to your fingers.
• For a little rising trick place your covered bowl of dough in the oven with only the oven light on as it will act as a perfect proofing environment.
source


I'd like to see u stuff the pita w/the falafel n it's acoutrements. Then, if your pita does NOT tear, it's a good pita!
Holy smokes😂 why the smokes is holy?
Is there a way to make pita without yeast? I'm on an anti-inflammatory diet, but I LOVE Mediterranean food.
Mine just will not puff up like that!! Ugh!
Thanks for the video. Seen so many videos on pita bread recipe, but not oven cooked, so I thought that pita bread cannot be cooked in the oven. But, thanks you made this video. I prefer the oven baked recipe because of its even done output.
More so, I was actually hoping to take a bit, but you beat me to it 😁
Have a prosperous forthcoming New Year 🎆🍾
I found my dough was TOO sticky… I kneaded it for your suggested time in my stand mixer but trying to work the dough I stuck to my hands like crazy
Thanks Chef Billy Parisi, great video. I have stayed away from making any bread or product with yeast because of past failures. Hot cross buns that could be used for baseball practice:( . Your video however intrigued me with it’s explicit simplistic method and your own experiences and childhood story. I wanted to make some whole wheat pitas for an appetizer I needed in order to make Christmas tree shaped appetizers for a small gathering with friends. Well the yeast took a bit longer to do it’s entire magic but finally bubbled up . After following your explicit directions other than not adding the last tablespoon of sugar ( we usually make sugar free loaves and desserts) to the flour. The dough was so sticky after mixing that it stuck to my hands even though I added a touch more flour it was barely manageable. Is it possible to overmix it by a few minutes? Hopefully it is proofing with the light on in the oven. I wondered where to purchase your measuring container and what type of thermometer do you use to tell what the water temperature is.Thanks again.
Is it a high heat on the stove top or medium heat?
The qty. Of the yeast was not clear if it is in gms or ml, 10 or 15 .
I love pita bread and I can't get where I live. Will try your recipe and if the bread swells I'll think it a miracle and be back to bow to you. Thanks!!
Baking soda ? Would that work instead of yeast ?
what kind of measurement is "packet"
Excellent recipe. We made a batch and the only issue was that about 50% of them did not fully bubble up and turn into pockets. Bubbles would form in the pita just like at 6:39 but then they would form small holes and not inflate further. Stove and oven produced similar results. I was wondering if anyone else has had similar issues and if so, what could be the issue?
I think the last time I wrote a YouTube review was > 10 years ago, but I just had to say, thank you so much! This was a wonderful tutorial! Now I can make pita bread to eat with the hummus you showed us to make. You're the man!
I ran across your channel and your pita bread looked really delicious but I like to work with my sourdough starter or discards I wish I could use this instead of yeast that you get n the store not sure how you would convert this using fresh sourdough starter
And for the folks living in the enlightened part of the world:
• 3 ½ dl (360 g) warm water (43 ºC to 46 ºC)
• 1 packet of active yeast
• 2 tablespoons sugar
• 7 ⅛ dl (384 g) all-purpose flour
• 1 ¾ dl whole wheat flour
• 2 teaspoons sea salt
• 3 tablespoons olive oil
Amazing I did two of your recipes and with a lots of success houmous think it came out amazing thank you and I love how you explain I just love it ❤
Baking bread is not very healthy. Could you tell us how to make bread without baking.
I add about a teaspoon of baking soda, gives it a great thickness
I do remember mom giving us store bought pita sandwiches in our lunches in elementary school in the 80's. Any way to use chickpea flour to make pocket pitas? I have a big bag of chickpea flour and want to use it to bake pitas 🙂
As always your recipes don't disappoint! Yummy and fun. So much better to do it on the stove top. I did not burn my eyebrows this time!!! Haha. Thank you so much for your fun and creative teaching. I enjoy cooking along with you! Blessings!!
The best recipe ever!!!! Thank you for sharing
Definitely will try it
thankyou
Amazing channel and recipe! Just subscribed.
I prefer measurements like (sprinkle some) and (add a little bit) or (add in Some whole wheat) instead of weighing the ingredients, it kind of adds to the excitement, also adds in some variability.
I did a little volunteering in a Mideastern deli, making pocket bread, several years ago. They ran the dough through a wringer to get it thin. 🙂
Wow!
My yeast was good as it doubled the dough within 90 mins. But, the bread did not swell up to make a pocket. Any ideas what could be the reason?
❤❤💚💚❤❤💙💙❤❤💜💜❤❤
👍🏻👍🏻👍🏻👍🏻
I agree i love the pan fried pita also great video billy , thats also my dogs name haha
How should I store my bread after I make it ?
I live in North Florida and the garage is the perfect spot to rise dough, it can easily be 95 degrees in there on a mild day…High humidity and the yeast goes nuts…