
Kamut Flour Bread Recipe with Biga

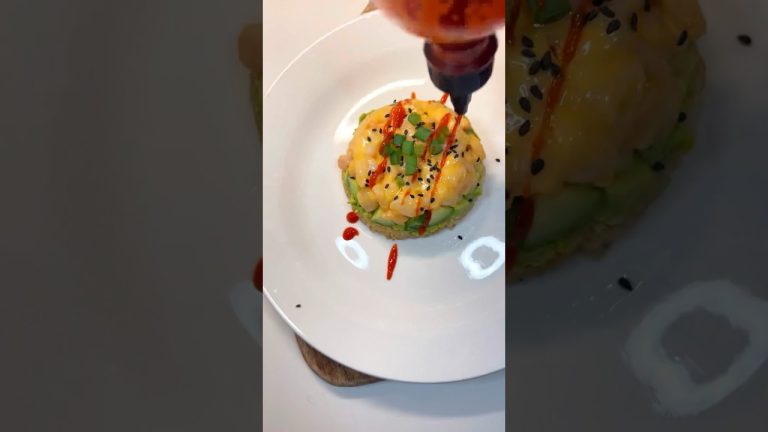
Elevate your bread making skills by making this kamut flour bread recipe that uses an age old Italian biga to make the lightest most delicious bread ever.
This is a sponsored conversation written by me on behalf of Bob’s Red Mill. The opinions and text are all mine.
When it comes to bread making there are several techniques to use when needing your dough to rise. I’ve shown you how to make a sourdough starter (levain) from scratch and then I’ve used in a Spelt Flour bread recipe and a Graham Flour rustic wheat bread recipe.
For this Kamut bread recipe I’m going to be using something called a Biga which is an Italian pre-fermentation method to help break down the gluten and provide tons of delicious flavor. Kamut is not gluten free.
PRINT THIS RECIPE:
SUBSCRIBE:
WEBSITE:
INSTAGRAM:
FACEBOOK:
PINTEREST:
Ingredients for this Kamut Flour Bread Recipe with Biga:
• 650 grams of Bread Flour
• 250 grams of Bob’s Red Mill Kamut Flour
• 150 grams of Ivory Wheat Flour
• 880 grams of water
• 25 grams of sea salt
• 4.5 grams of active yeast
Makes 2 loaves of bread
Prep Time: 17 hours
Cook Time: 1 hour
Procedures:
1. In a large container mix together 550 grams of bread flour with 396 grams of water at 80° to 82° and .5 grams of yeast until combined. Cover and let sit at room temperature for 10 to 24 hours or until tripled in size.
2. In a separate large container mix together the remaining 150 grams of bread flour, kamut, ivory wheat flour, salt, remaining 4 grams of yeast and remaining 484 grams of water at 100 to 102° until combined.
3. Add the biga to the mixture and vigorously mix it by squeezing, stretching and folding until completely mixed in, about 3 to 4 minutes. Cover and let rest for 20 minutes.
4. Fold the dough by stretching and turning it 6 to 8 times every 20 minutes for 80 minutes.
5. Cover and let rest for 2 more hours or until tripled in size.
6. Divide the dough on a clean surface dusted with flour and form 2 dough balls. Transfer each to a floured proofing basket, cover with a towel and let proof for 60 to 90 minutes.
7. Place 2 Dutch oven pots into an oven and preheat to 500° and let sit for 30 minutes.
8. Remove the pots and place the dough carefully into each Dutch oven. Cover and bake for 30 minutes, then uncover and bake for another 20 to 25 minutes or until the outside of the bread is dark brown.
9. Set on a cooling rack for 30 minutes.
10. Slice and serve.
source
What gives me a crunchy across the biga or poolish. I like big round hard bread outside
Hi Chef. Great video. Can you clarify the bread flour weights in procedure 1 & 2. They don't seem to add up to what's listed in the recipe. Thank you.
If you mill your own flour, you would be getting the full benefits of the flour. In order for them to make that flour shelf stable they must remove the very ingredients from the grain in order to make ot shelf stable. It no longer contains the germ not=r the hulls, all that is left is protein and starch. Not good for man or animal.
very nice
He said your wife wanted you to make sourdough bread every day now you are adding store-bought yeast I don’t understand but I am very interested in the commit flour because I have IBS thank you for the video
Is it possible to substitute the other 2 flour for KAMUT flour only?
FYI…it's BEE-gah (biga), luh-VAN (levain), poo-LEESH (poolish), and BROHT-form (not brat (like the sausage) form)
Nice✅🌹🌹🌺🌹👌👌👌👌👌👏💛👍👍👍👍👍👍👍👍👍👍👍👍
My knowledge up till now was that: Biga was low hydration (around 50%), barely mixed; Poolish is usually 100%. One of the reasons for Biga or Poolish is to save up on the yeast – so no additional yeast needs to be added in the bread dough – Biga/Poolish should serve almost as fresh yeast here.
Can a stand mixer do the job?
Nice video. Would love to see this made with freshly ground flour instead of the processed shelf stable flour.
It’s “bee-gah” and a Biga is low hydration compared to a poolish. Biga is classically about 50-60% hydration where Poolish is 100%.
Making this now, wish me luck
Love kamut!! (I grind fresh flour from the berries).
Is there a way to make a single loaf recipe? Otherwise how do you bake two if one only has one oven and dutch oven? Is the other fine staying out while other is baking or does it over proof?
ماشاء الله
اكثر من رائع
ممكن ترجمه بالعربي
He quick fermentation…over night
Me: looks at clock to see if I can have it with jam and butter in the morning! 🤤🤣
Hi
I made the bread. Tasted very good but was very dense. My same problem with most bread making. Can you give me som advice on what I may be doing wrong? Thanks much.
way too much flour on bread exterior -at least brush it off before eating. Better yet use less on work surface IMHO
arrgg. roll up your sleeves! wear an apron. so messy!
What camera do you use?
This was such a nice presentation.
I love kamut.
Biga, Biga, Biga can’t you see, sometimes your bread just hypnotize me…
Thanks for the lovely bread from Singapore 🇸🇬
Can i replace the amount of Ivory Wheat flour with Kamut or bread flour?
Is there a way to make this without any white flour? My husband is gluten intolerant but can have Kamut flour once in a while.
I wrote more than I meant here. Appologies – But don't confuse us monkeys please!
"A biga uses an overall higher hydration percent" (Than a poolish). Surely it's the other way around? I use poolish at 80% – 110 percent hydration which is pretty standard across the board… Lepard, Forkish, Reinhart – To name just a few. My Biga is usually about 60% – 70%. Again fairly standard stuff.
Didier Rosada points out that in Italy bigas were traditionally 50%-55% hydration though. And, Didier adds, "For Italian bakers, biga is more a generic term for preferment than a specific process. In the United States, occasionally the word biga is used instead of prefermented dough, poolish, or sponge to add a touch of 'Italian authenticity' to the bread.
"
The term sponge has gone out of fashion, but it originated in England and was the standard practice prior to the Chorleywood proces. The hydration was typically about 60% to 63%.
And, yes I know these are just guide windows, not rules.
But, you go on to say that sitting the leaven overnight the hydration levels are the other way around poolish vs biga! So it is you marvellously confuse the difference between the three. I think I'll stick to the good old fashioned term – Pre-fermented Leaven. Let the hydration be what I want it for the bake in hand. 🙂
Great video though – Thanks 🙂
Great video! The gas bubbles are not air but carbon dioxide for the fermentation of the yeast. I make the
same bread and receipt but don't use the oil as the bread can become too oily. It will seep through the
paper storage bag. Don't store bread in plastic as it becomes gummy. You made a very good video
on bread making. Patrick Raffaelo artist
italy is the mother land ? 😆😆 oh okay
A poolish is higher hydration than a biga
Can I leave the Kamut flour as I can not get it in my country?
Amazing and easy to prepare, super delicious with cheese , olive oil and thyme
Thank you!