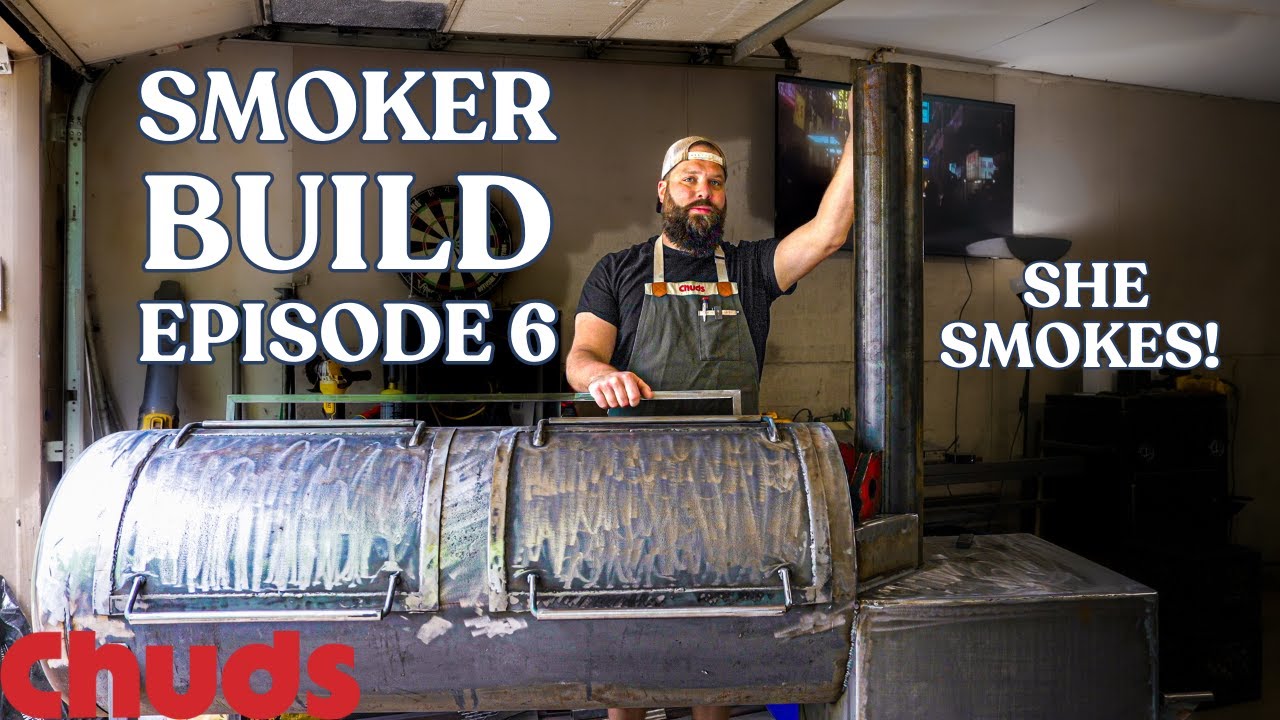
Smoker Build Ep. 6 Almost Done! | Chuds BBQ

Please LIKE and SUBSCRIBE
Patreon.com/ChudsBBQ
ChudsBBQ.com
Insta: chudsbbq
►Full list of things I use and recommend:
_________________________________________
Pots & Pans
_________________________________________
►Made In Stainless Clad Set
►Made In Carbon Steel Set
►Made In Wok
Knives
_________________________________________
►8″ Chef’s Knife
►6″ Nikiri
►Boning Knife
►Bone Saw
Meat Processing
_________________________________________
►Meat Grinder
►Sausage Stuffer
►Meat Mixer
►Meat Slicer
Appliances
_________________________________________
►Weber Kettle
►Chamber Vacuum Sealer
►Sous Vide
►Toaster Oven
►Deep Fryer
►Vitamix Blender
►Kitchenaid Mixer
►Food Processor
Ingredients
_________________________________________
►Chud Rub and 16 Mesh Black Pepper
►Fogo Charcoal
►Wagyu Tallow
►Dough Conditioner
►High Temp Cheese
►Pink Salt
►Sodium Citrate
►Hog Casings
►Sheep casings
Small Cooking Tools
_________________________________________
►Pepper Cannon
►Instant Read Thermometer
►Flame Thrower
►Fire Blower
►Cold Smoke Generator
►Injector
►Scale
►Rub Tub
►Burger Press
►Butcher paper
►Paper stand
►Cutting Board
Welding Tools
_________________________________________
►Blowtorch
►Welder
►Angle grinder
►Grinder Blades
►Chop Saw
►Pipe Level
Camera Gear
_________________________________________
►Camera
►Camera Lens
►Tripod
►Drone
Was trying to order a smoker from you, but the waitlist has been closed for a while. Any update?
Love the series cant wait to see to see you cook on it.
I want one!!
Really enjoying seeing this beast come together! I noted how much of a struggle you had around 3:55 to get the end cap mounted. The boilermaker I learned to weld from often coached that it's always OK to temporarily tack pieces together, then cut out the welds and grind the surfaces smooth. Next time you have a task like that, maybe tack on some tabs of flat bar to the underside of the barrel to hold the end cap in place with a clean fit, rather than brace it with your knee and hope it all stays aligned while you try to get the cap tacked into place?
Plasma cutter bud!
Love the smoker build
ok… so i have a Oklahoma Joe reverse smoker…and the #1 problem is that the baffle plates are too close to the cooking grates…they get too hot. Good to see you put these lower in the cook chamber.
behind every great welder is an anglegrinder with a flapdisk.
Is there really a difference between buying the Markal pro pen and an off brand?
Wouldn't it be better to have the collector up off of the firebox ?? Won't that end of the cook chamber still get really hot ? What about the effect on airflow, cooler air coming through the cook chamber hitting very hot air in the collector ?
Just curious on why you left the baffle plate loose? You can't remove it either way.
Love the series BTW
One thing I regret on mine is my lower grate sits a bit too close so it actually cooks from underneath as well so I simply have to elevate it with some bricks or something to keep it up some bit further. Let me know your thoughts after a long brisket cook….that'll be your test there.
Love it
Can't wait to see this thing at work. Nice one mate.
Man I’ve enjoyed this so much! How much do you think this pit weighs?
The location of your grease drain is in the shell of the vessel. On a reverse flow it should be on the baffle plate, not the external. You need to drill a hole in the baffle plate, and put a steel tube down to the shell. If you rely on the plate to overflow with grease then run down the shell of the vessel towards the firebox drain, you are risking a large grease fire. Typical reverse flows have the drain away from the firebox, on the exchange side, so you can utilize more of the surface area of the plate for collection.
Are you going to put a short wall at the end of your baffle plate to keep the grease from flowing underneath it? It would be really hard to clean out underneath it if you don’t. Mine has the drain with a pipe from baffle plate to the bottom of the smoker.
Sweet 😎
Awesomeness💪🏼💪🏼💪🏼🫡
Weld a handle on the end so moving easier
love it, now to convince my wife I need to build my own smoker…
👍
Dude!!! These videos are so awesome. I’ve been dying to take a welding/fabrication class at my local community college and this series has been the kick in the ass to go get it done! Plus if I’m gonna pay some chump ass school to play in their shop I might as well make myself a handful of pits lol
How much? @Chuds
Looking forward to the first actual cook results vs a regular offset.
Hows your welding tan..lol
Put a fender washer over the pilot bit in-between the hole saw and metal to help keep the pilot bit and your wrist from breaking
Brad thanks for this build series. I enjoyed seeing how much you have been able to excel in 2 completely different skill sets! Great job!
Almost thought you were gonna sing that Enya song to the refrain of "Smoke away smoke away smoke away'…
Great video
I was confused about what a reverse flow smoker was so thank you for explaining it in this episode. I’m so excited to see you season it in and cook on it!!
Hey question. How is the grease drain going to work if the baffle plate is in the way?
Need you a magnetic drill press!
Really nice build
Looks great.. thought maybe a thermometer in the cap?
If I were building this, or any pit, my rule of thumb would be to have the top of the stack at least a foot taller than me, or at least 7 feet tall, to ensure smoke doesn’t come out straight into my face.
You need a mag drill, save those wrists. There are some cheapish ones, check Death Toll Racing for a review not too long ago.
I can't wait until you make beef ribs on this BEEYOST